

The Risk tab
Risk Score Over Time
The Risk Score Over Time button at the top of the tab opens a chart of the assessment’s Risk Score across its recent scans. Hovering over a point shows the score for that scan with the number of new, resolved, regressed, and open findings, each compared with the scan before. The button only appears once the assessment has more than one scan in its history. See score history for how the score is tracked.The issue group list
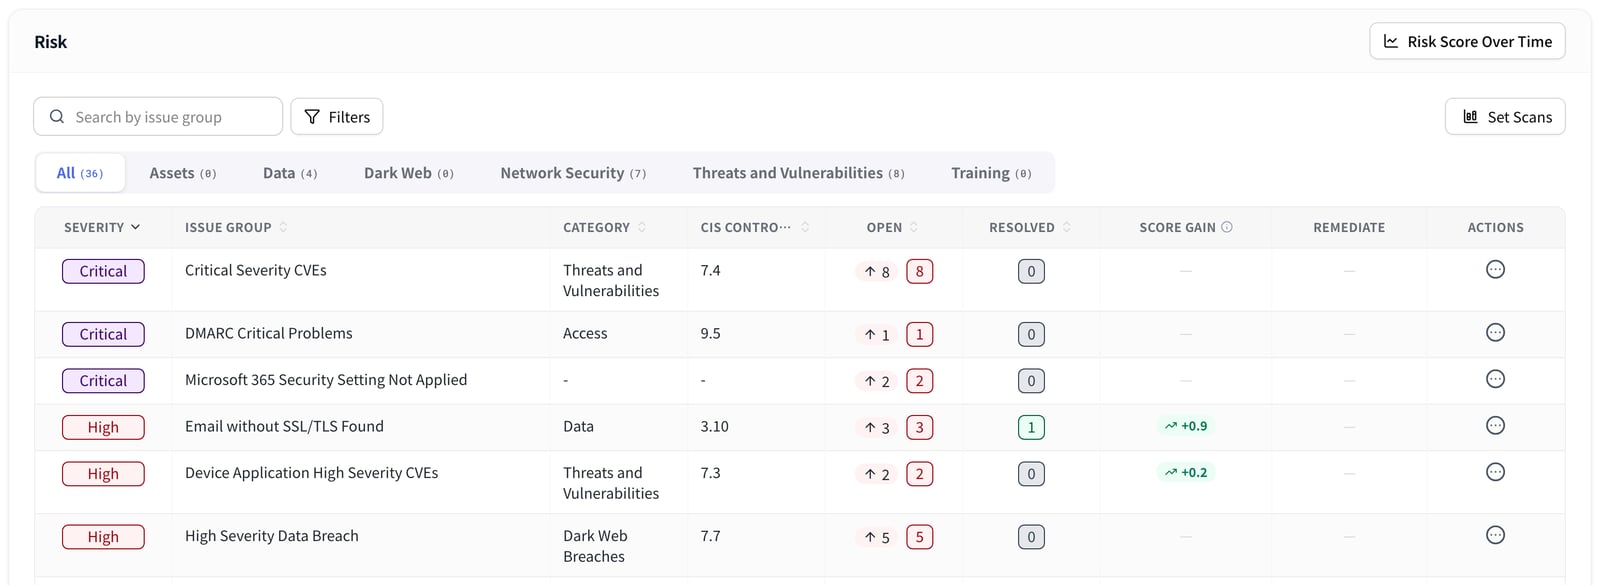
The tab opens on a list of issue groups, such as a type of misconfiguration or a set of vulnerabilities. It is sorted by severity, highest first.
Above the list you can search by issue group name, filter by severity in the filters menu,
and narrow the list to one category with the pills: All, Assets, Data, Dark
Web, Network Security, Threats and Vulnerabilities, and Training.
Comparing scans
When the assessment has more than one scan, Set Scans picks which two scans the counts compare. As of is the scan you are looking at, and Compared to is the earlier scan it is measured against. By default these are the latest scan and the one before it.Inside an issue group
Click a row to open the group. The heading shows the group’s name, severity, and CIS control, and the back arrow returns to the list. For most groups, the page lists every finding in the group. A status filter shows New, Regressed, and Open findings by default; tick Resolved to include resolved ones. Tick the findings you want and click Accept/Resolve to record a decision for all of them, or use Accept/Resolve in a row’s action menu for one finding. The decision is recorded in the Risk Register. Vulnerability groups open with three views instead:
In By CVE and By Device, you can filter by device (or domain or asset), by CVE, and by
severity, and search. By CVE also has Exploitability filters for KEV and
Exploit. Export All (XLSX) downloads the assessment’s vulnerabilities as a
spreadsheet. Each row’s action menu has Accept/Resolve, which applies the decision to every
finding in that row.
The PSA column
When findings for the assessment are synced to a PSA, the finding tables get a PSA column with a status dot per finding. The dot shows whether the finding has a ticket in your PSA. Clicking a dot syncs that finding now, or opens its existing ticket. In By CVE and By Device, a PSA Sync column shows how many of the row’s findings are synced.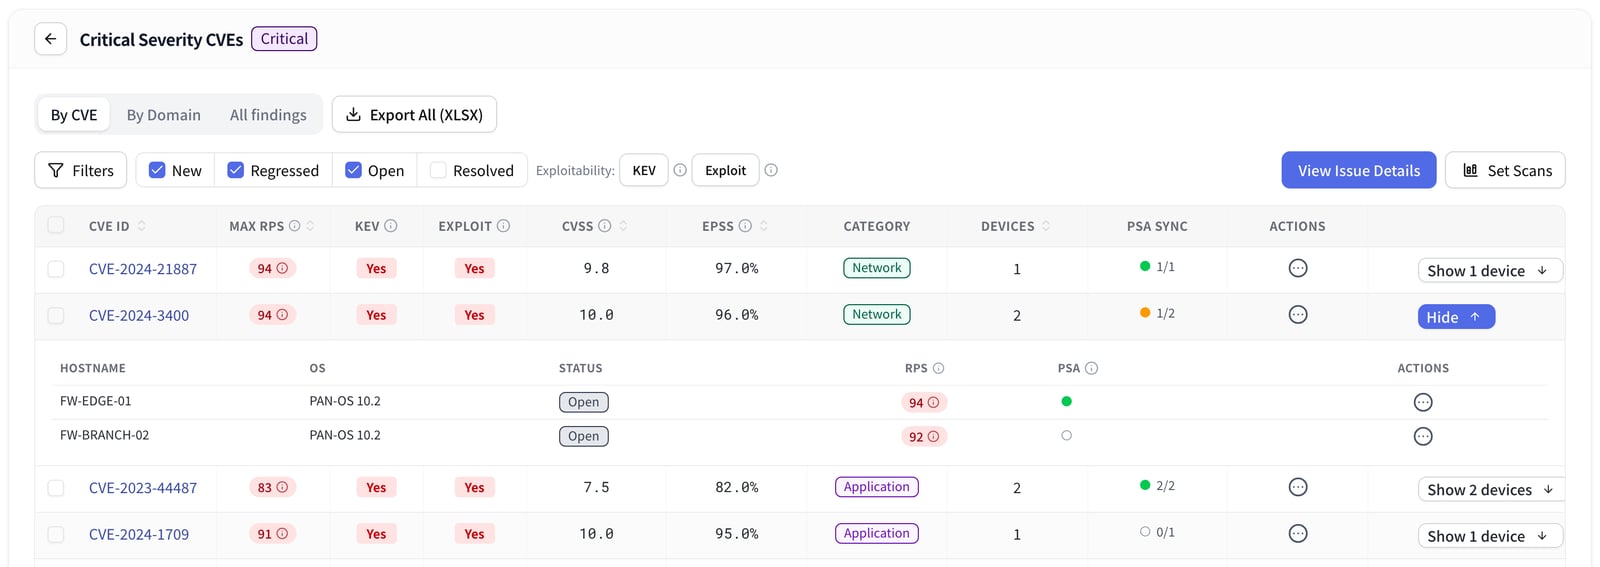
The finding drawer
Click a finding to open its details in a drawer on the right. It shows:- A summary with the risk level, impact, CIS compliance status, the identifier (such as the device or domain), and the detected value
- The finding’s PSA ticket, when sync is on
- For a vulnerability, the CVE with its CVSS score, exploit, KEV and EPSS signals, publish date, and where it was found, followed by remediation guidance, affected products, and the version that fixes it
- The recommendation, CIS control requirements, and references
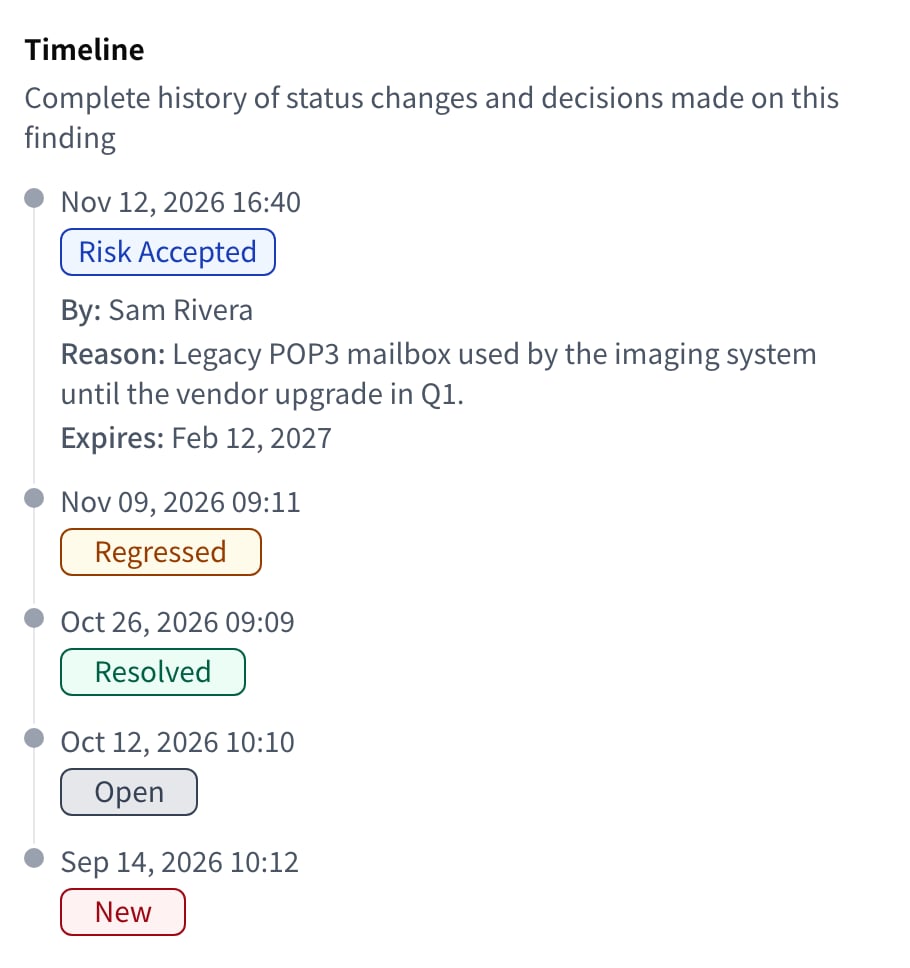
- A Timeline with every status change and every decision made on the finding, with who made it, the reason, and when it expires
The Priorities tab
The Priorities tab, titled Risk Priorities, lists every CVE and every affected device in the assessment across all severities, ranked by RPS with the highest first. It shows the latest scan only, and it has two views: By CVE and By Device (or By Domain or By Asset, depending on what the vulnerabilities affect). There is no All findings view. When any CVE on the assessment is in the CISA Known Exploited Vulnerabilities (KEV) catalog, a red banner at the top gives the count, and an amber banner counts the CVEs that have a public exploit but are not in KEV. View on either banner switches to By CVE filtered to those CVEs.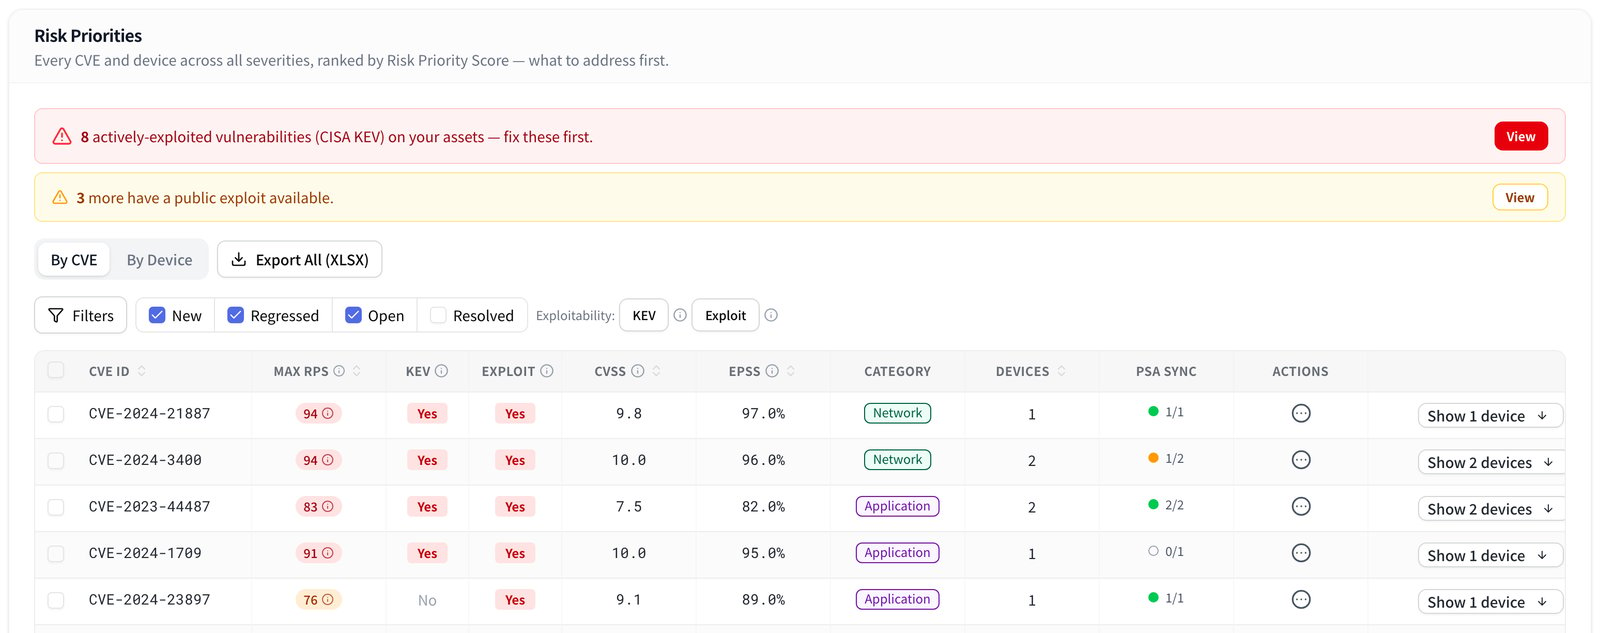
By CVE
By Device
Both views are sorted by RPS by default, 25 rows per page, and can be filtered, searched, and
exported in the same way as the vulnerability views on the Risk tab. Hover over the
information icon next to KEV, Exploit, CVSS, EPSS, or Asset Criticality for a short
explanation of the signal. To change a device’s criticality or the weights behind the RPS, see
Setting asset criticality and
Adjusting the RPS weights.
Related guides
Risk Score
How the Risk Score and the Risk Priority Score are calculated
Risk Register
Where accept and resolve decisions are recorded and reviewed
Integrations
Connect a PSA so findings open service tickets
Navigating an Assessment
What each tab of an assessment is for