

Install the agent
- With an RMM or MDM
- With the installer
Each assessment has its own install command. Under Instructions for RMM, select Copy next to the install command and run it as root from any RMM or MDM that can run a shell script,
or in Terminal on the Mac:The copied command already contains the assessment’s ID. The script detects whether the
Mac has Apple Silicon or an Intel chip and installs the matching package.Tools that already run scripts as root, such as Jamf Pro, Kandji, Mosyle, Microsoft Intune,
and NinjaOne, do not need the 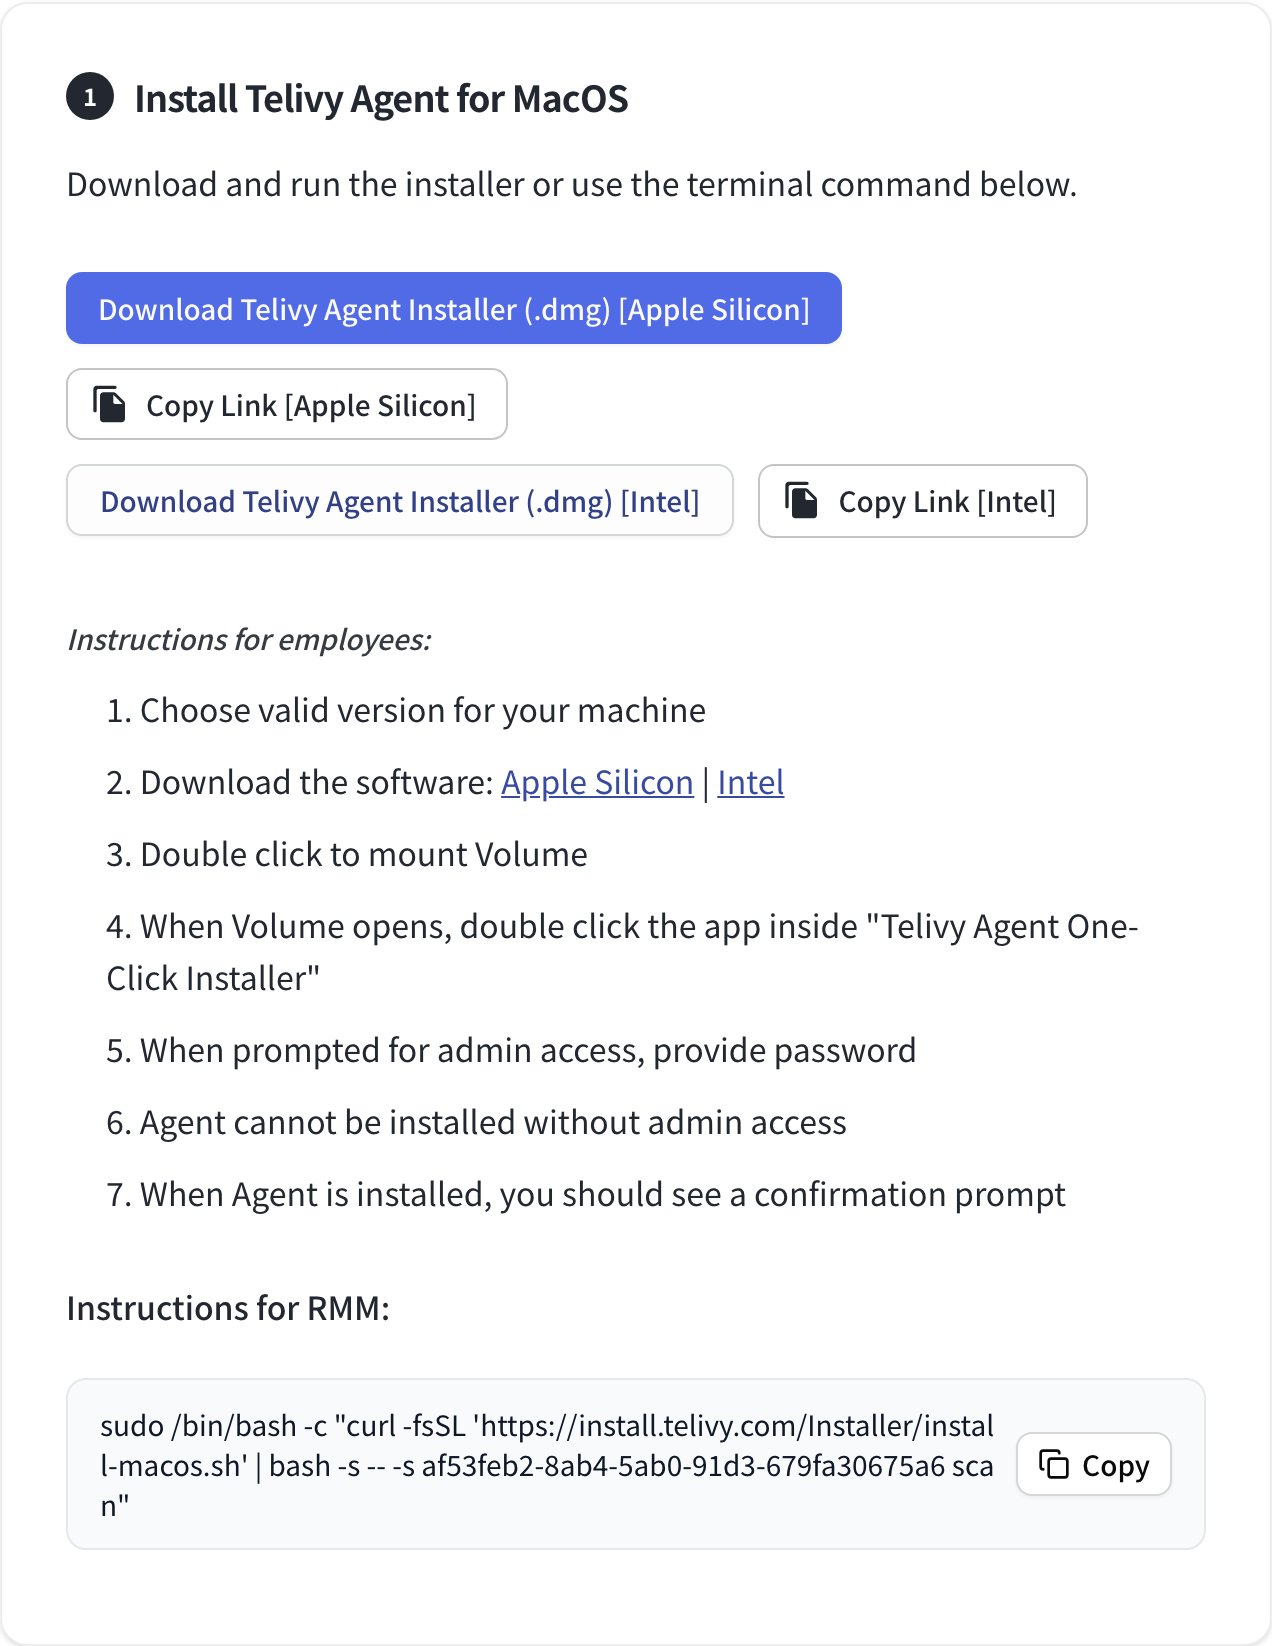
sudo prefix. Leaving it in is harmless.Grant the permissions the agent needs
macOS asks each user to approve access to files and saved passwords. Without these two steps the agent still runs, but PII and password results are incomplete. Ask the person using the Mac to do both after the install.1
Turn on Full Disk Access for PII scanning
Open System Settings > Privacy & Security > Full Disk Access, find Telivy.Scanner in
the list, and turn it on. macOS asks for the user’s password to confirm.
2
Allow Keychain access for password scanning
In Finder, open the Applications folder and open Telivy.Scanner.Mac. It starts a
setup mode that asks for Keychain access once for each Chromium-based browser, such as
Chrome, Edge, or Opera. Enter the password and choose Always Allow each time.
Agentless deployment
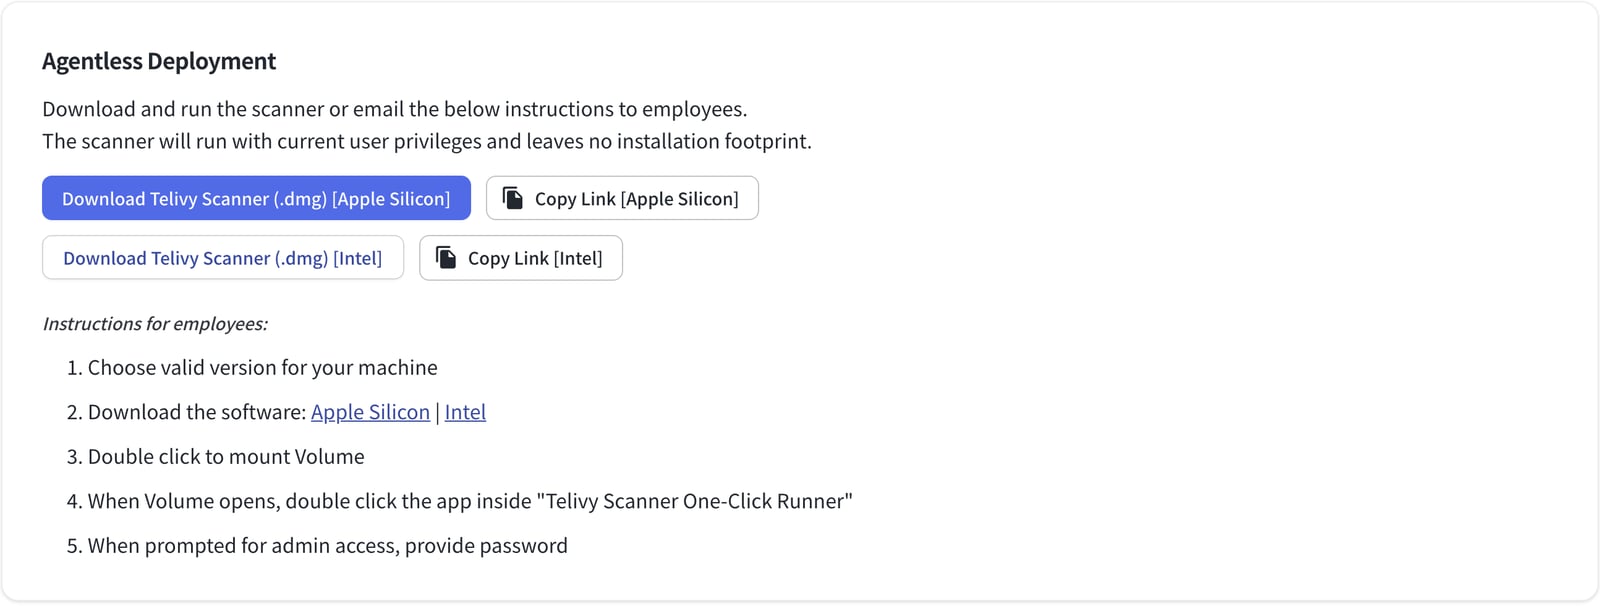
Use the agentless scanner when you cannot install software on the Mac, or when you want employees to run a one-time scan themselves. Select Agentless, then Download Telivy Scanner (.dmg) for Apple Silicon or Intel, or Copy Link [Apple Silicon] or Copy Link [Intel]. Send employees these steps:- Download the version for the Mac’s chip.
- Double-click the file to mount it.
- In the window that opens, double-click Telivy Scanner One-Click Runner.
- Enter an administrator password when asked.
What happens after install
The installer addsTelivy.Scanner.Mac to the Applications folder and a background service
that starts with the Mac. Like the Windows agent, it checks in once an hour and starts the
scanner, which only collects what is due. Scanning Schedule
lists how often each check runs. The Mac then appears under Deploy Agent > Deployment
Status and on Inventory > Endpoints.
Keep the agent current with auto-update, which
supports macOS. To remove it, see Uninstall on macOS.
If a Mac does not appear or its results are incomplete, see
Troubleshoot the Telivy Agent.